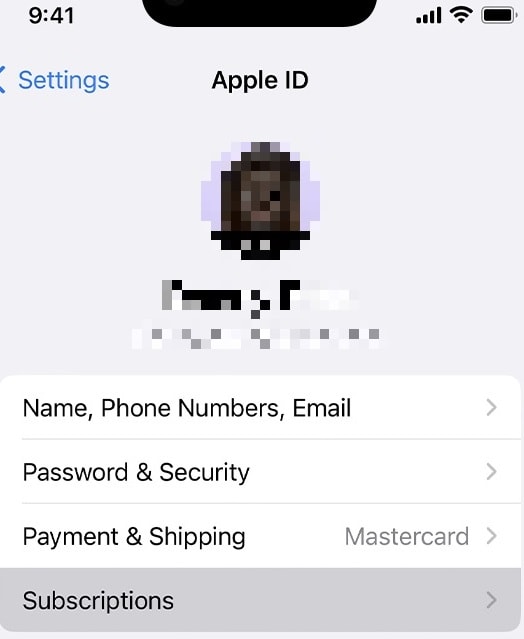
Dr.Fone - Screen Unlock (iOS)
Reset iPhone without Apple ID
- Simple, click-through, process.
- Remove screen passcodes, Face id, Touch id, Apple ID and Bypass iCloud Activation Locks
- No tech knowledge required, everybody can handle it.
- Supports the latest iOS version fully!

How To Change Country on App Store for iPhones With 7 Methods

Dec 06, 2023 • Filed to: Remove Screen Lock • Proven solutions
Changing your App Store country can give you access to apps that are not available in your region. Whether getting region-specific apps, accessing exclusive content, or switching to a country with better app offerings, it's a valuable capability.
The article below guides you through seven methods on how to change the country of your App Store.Following the guide ensures access to a world of apps and content tailored to your preferences. Keep reading the page below to achieve this.

Part 1. Pros and Cons of Changing Your App Store Country
Changing your App Store country on your iPhone can offer various benefits, but it also comes with certain drawbacks. It's necessary to consider the pros and cons before making this decision.
Pros
- Access to Region-Specific Apps.Different countries have unique apps tailored to their markets. By changing your App Store country, you can access apps that might not be available in your current region. For example, some popular Chinese and Japanese apps are unavailable in the US App Store. If you want to use these apps, you will need to change your App Store country.
- Getting App Updates.Sometimes, apps receive updates and features in certain regions before others. Changing your App Store country can give you early access to these updates, improving your app experience. For example, a gaming app might first release new levels or features in select countries.
- Access Exclusive Content.Some apps and content are exclusive to certain countries. By switching your App Store country, you can enjoy movies, music, or TV shows unavailable in your current region. For instance, certain Netflix shows are restricted to specific countries due to licensing agreements.
Cons
- Loss of Access to Purchases.If you've made purchases in your current App Store country, changing it can result in losing access to those purchases. The loss includes paid apps, in-app purchases, and subscriptions. For example, if you switch from the US to the UK store, you may lose access to US-specific subscriptions.
- Offload Apps.When you change your App Store country, your device may prompt you to offload apps that are not available in your new region. This can be inconvenient if you rely on specific apps for daily use. For instance, a banking app may be region-specific and unavailable in your new country.
- Family Sharing Issues.If you're part of a Family Sharing group, changing your App Store country can affect the access and sharing of purchased apps and subscriptions. Family members may lose access to content tied to your previous country. For example, if you switch from the UK to the US store, your family members might no longer have access to UK-specific content.
Part 2. Different Methods to Change Your App Store Country
Changing your App Store country can be done through various methods. Below are different ways to achieve that, along with step-by-step instructions for each technique.
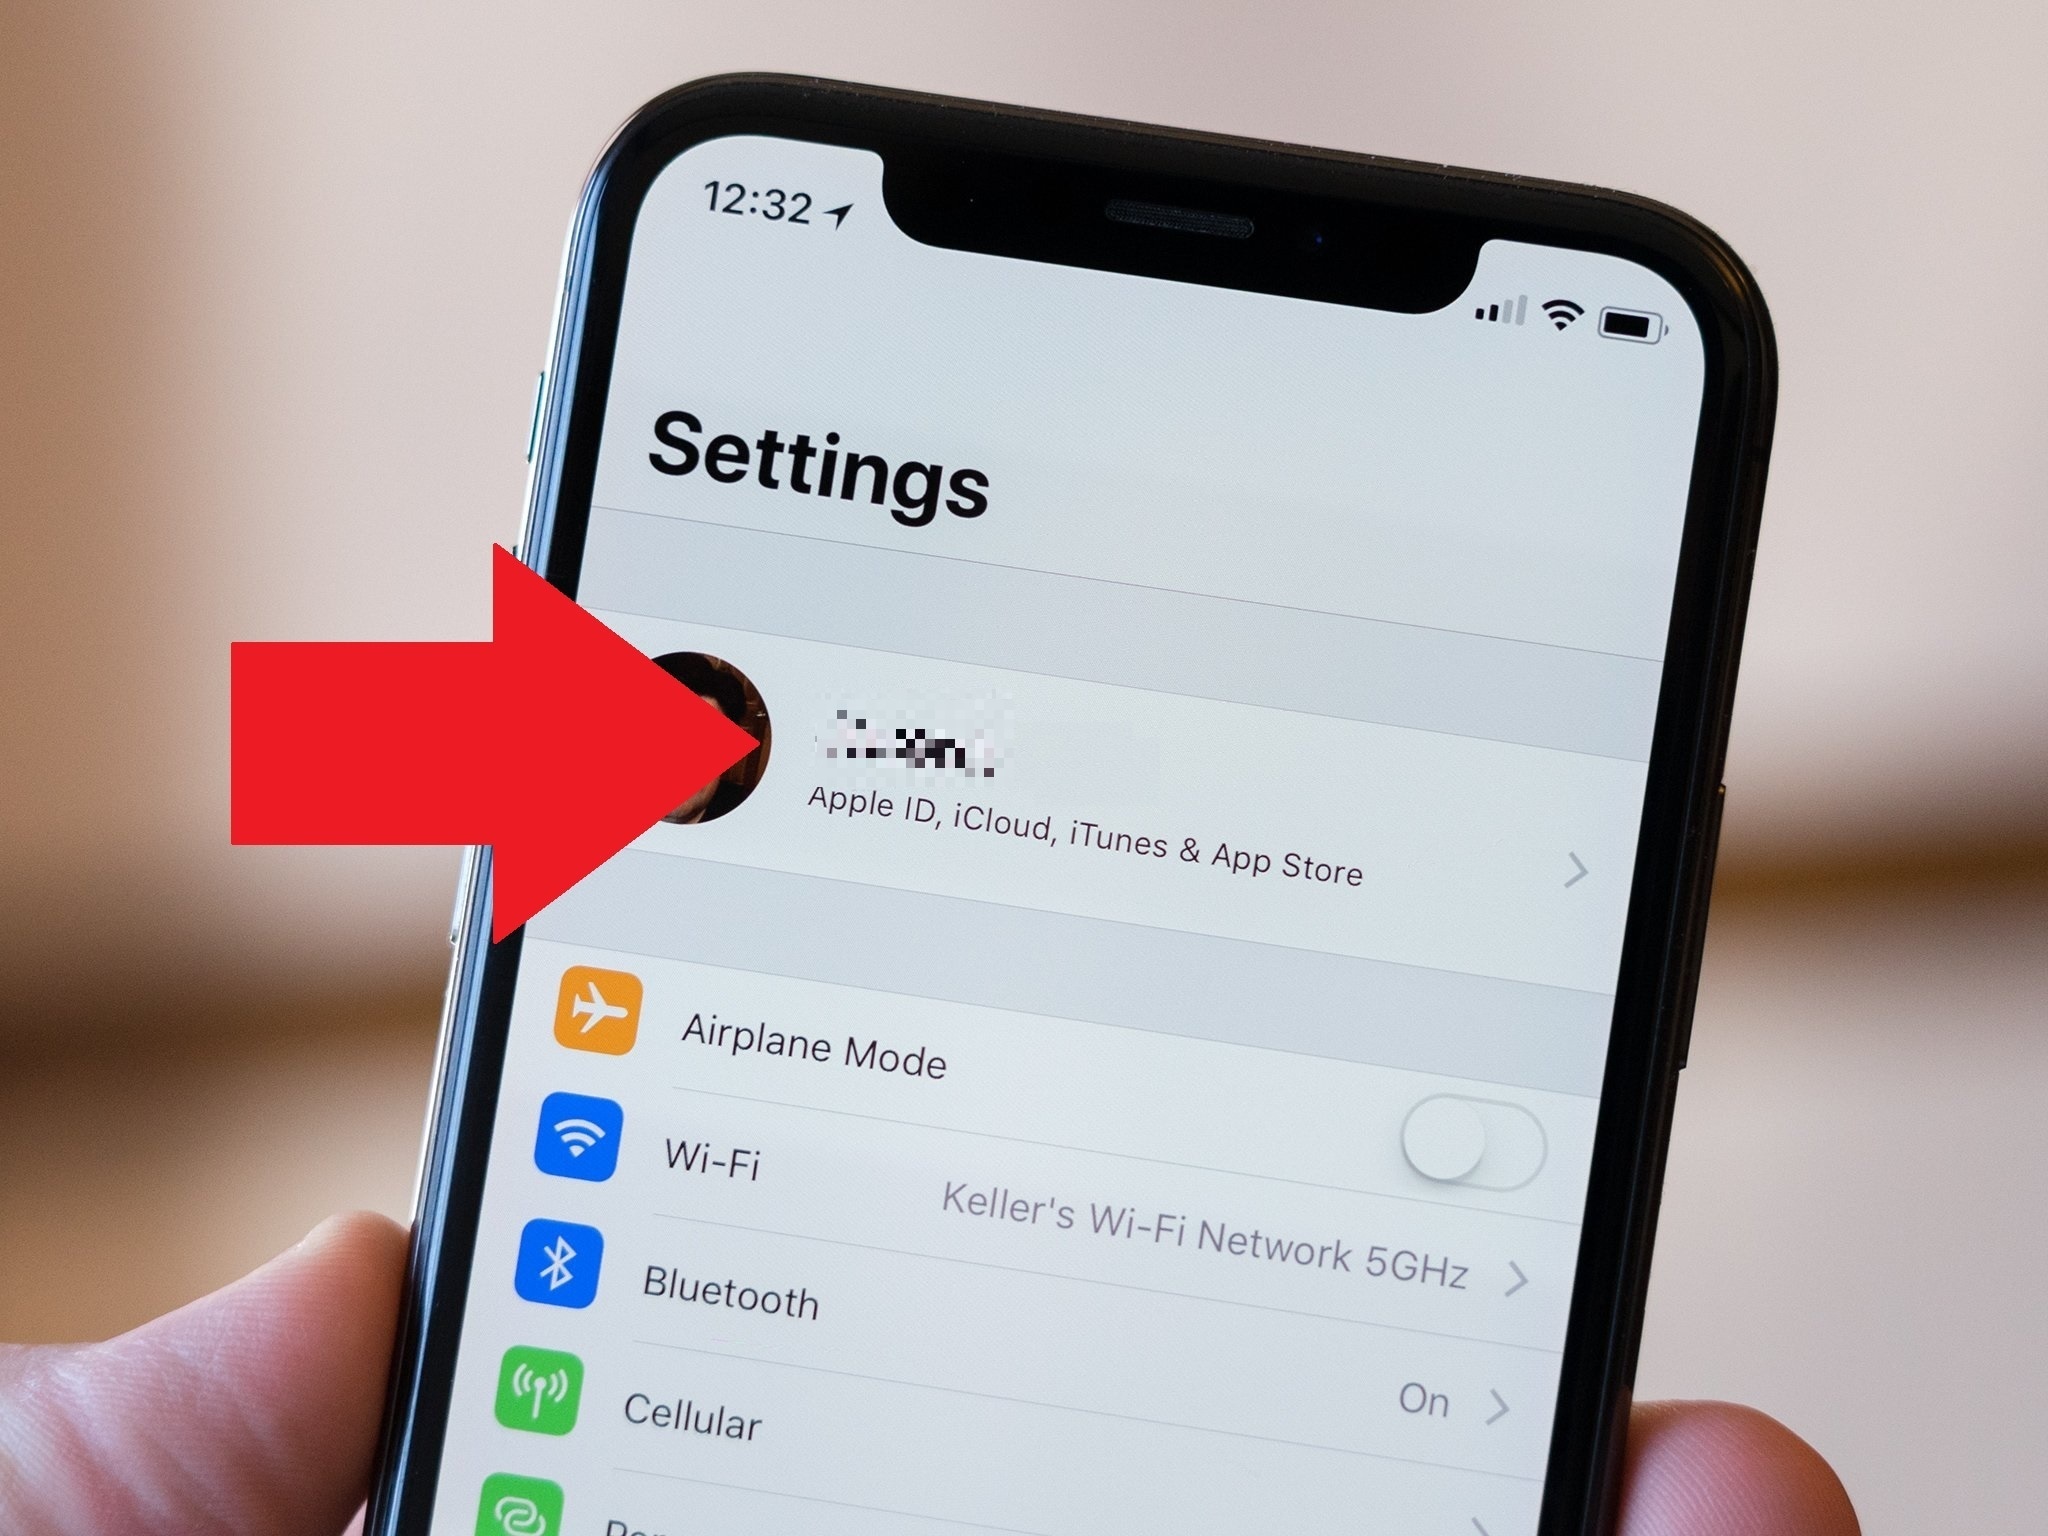
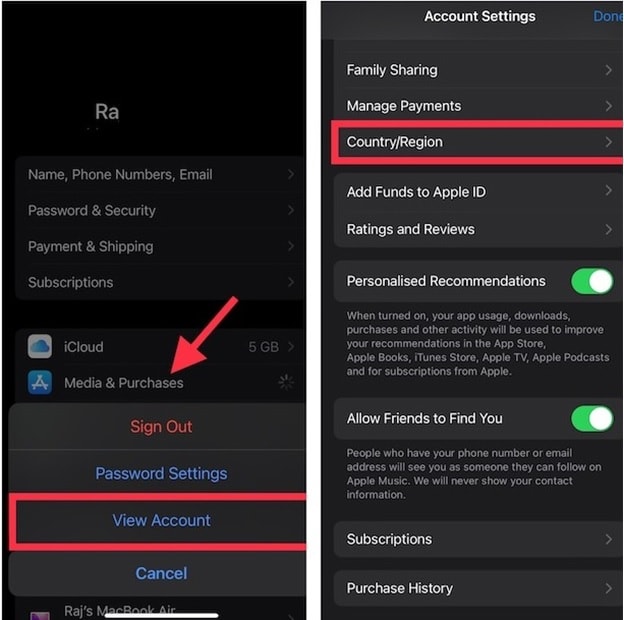
Method 1: Changing Apple ID Region via iPhone
It is the most common and straightforward way to change your App Store country. To do this, follow these steps:
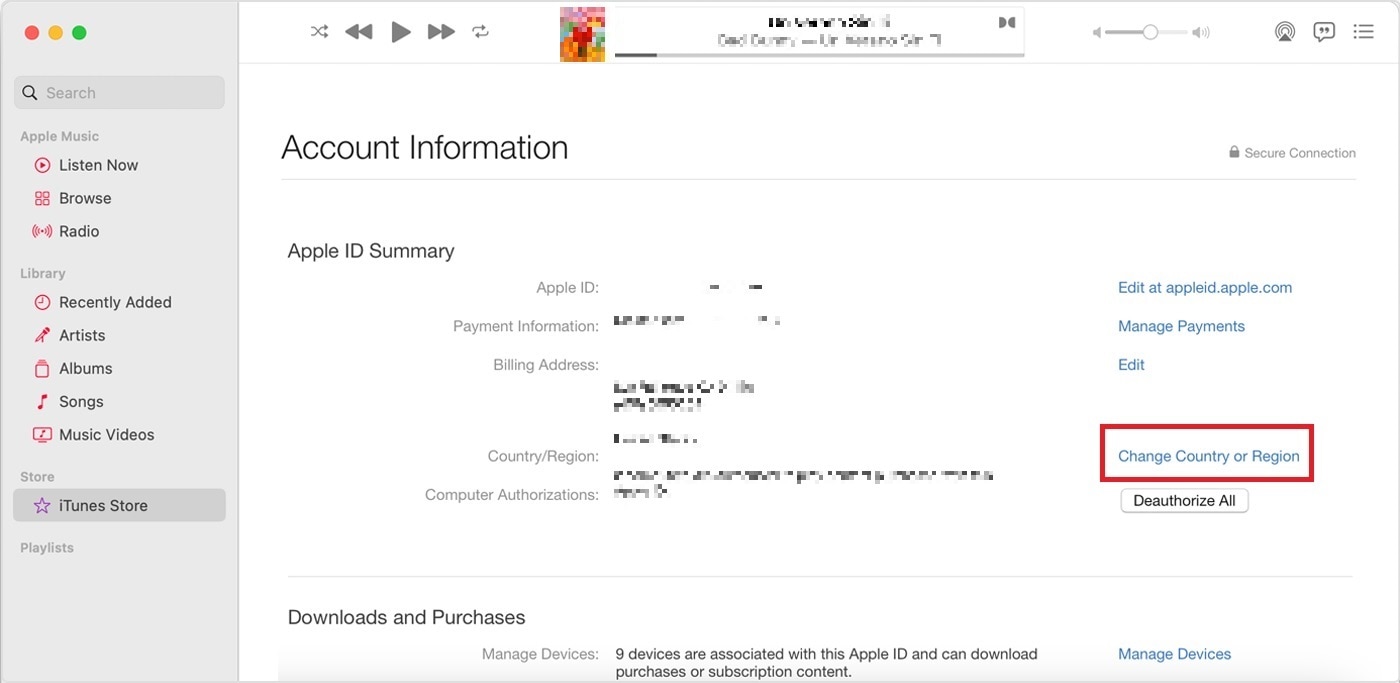
Method 2: Changing Apple ID Region via Mac/Windows
To change your Apple ID region via Mac/Windows, follow these steps:
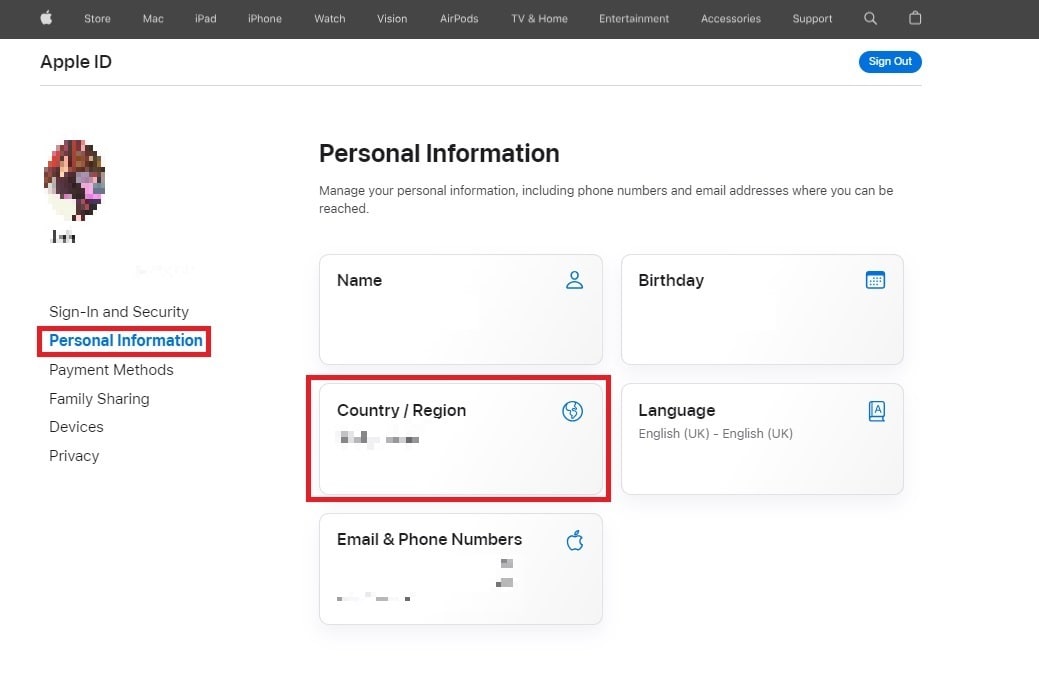
Method 3: Changing Apple ID Region via Web
The steps below are to change your Apple ID region via the web.
Method 4: Leaving a Family-Sharing Group
If you're part of a family sharing group, you need to leave the group before you can change your App Store country. To leave a family sharing group and change your app store country, follow the steps below.

Method 5: Cancel All Subscriptions
If you have any subscriptions, you must cancel them before changing your App Store country. Here are the steps below.
Method 6: Using a VPN
You can also use a VPN to change your App Store country. However, this method is not recommended, as it can be unreliable and may result in your account being banned. Here are the steps below.
Method 7: Creating a New Apple ID
Finally, you can create a new Apple ID account with the country you want your App Store country to be. Here are the steps below.
Sometimes, changing your App Store country can lead to issues. It can lock you out of your Apple ID, or you're forgetting your password. During these events, it can restrict your App Store access. In such cases, a tool like Dr.Fone - Screen Unlock (iOS) can come to the rescue.
Part 3. Changing Countries Not Going Your Way? Use Wondershare Dr.Fone – Screen Unlock
Dr.Fone - Screen Unlock (iOS) helps you regain access to your Apple ID and fix any login-related problems. It ensures that you can continue enjoying your App Store without any hindrance. It's a safe and reliable software tool that is used by millions of people to unlock their devices. It is also easy to use, even if you are not tech-savvy.

Key Features
Dr.Fone - Screen Unlock (iOS) is a powerful tool that can help you to:
- Unlock iOS Device Without Passcode.Regain access to your locked iPhone or iPad without needing the passcode.
- Remove All Lock Screen Types.Versatile unlock support for 4-digit/6-digit passcodes, Touch ID, and Face ID lock screens.
- Unlock Apple ID Without Password.Effortlessly unlock your Apple ID without requiring the password, simplifying access.
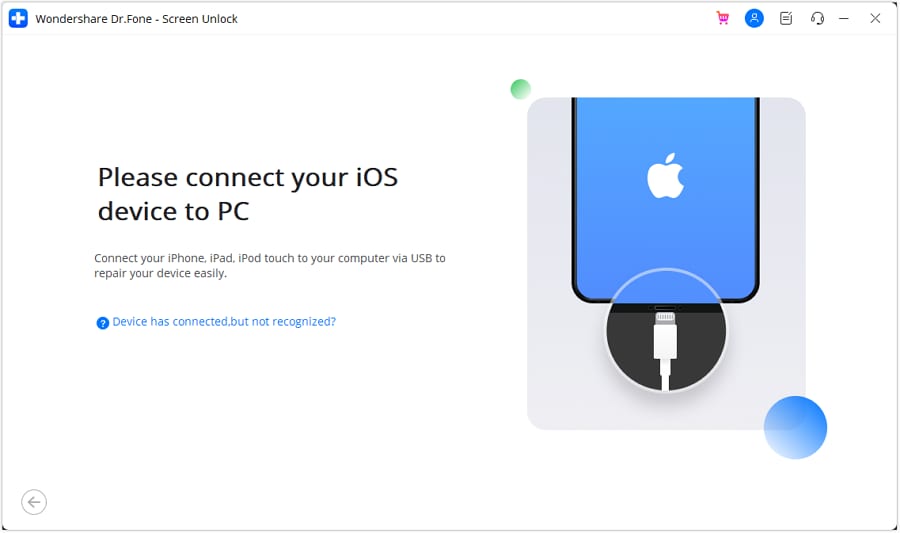
How To Unlock Your iPhone in Seconds
Dr.Fone's Screen Unlock tool offers a streamlined solution to get you back into your device within seconds. Here's a simple guide on how to do it.

Conclusion
Changing your App Store country can open doors to region-specific apps, exclusive content, and timely updates. However, it's important to consider the potential drawbacks, such as losing previous purchases.
When changing the App Store country on your iPhone, it's important to consider Apple ID access issues. You never know when you will get locked out or suddenly forget your password. Wondershare Dr.Fone - Screen Unlock (iOS) offers a reliable solution during these instances. The tool ensures uninterrupted access to your App Store and Apple ID account, making it a valuable resource for managing your digital experience seamlessly.


iPhone Unlock
- Access Locked iPhone
- 1. Reset Locked iPhone Without iTunes
- 2. Erase Locked iPhone
- 3. Get Into Locked iPhone
- 4. Factory Reset Locked iPhone
- 5. Reset Locked iPhone
- 6. iPhone Is Disabled
- 7. Fix iPhone Unavailable Issue
- 8. Forgot Locked Notes Password
- 9. Unlock Total Wireless Phone
- 10. Review of doctorSIM Unlock
- iPhone Lock Screen
- 1. Unlock iPhone with Apple Watch
- 2. Unlock Forget iPhone PIN
- 3. Unlock iPhone When Forgot Passcode
- 4. iPhone Lock Screen With Notification
- 5. Remove Passcode From iPhone
- 6. Unlock Found iPhone
- 7. Unlock iPhone without Computer
- 8. Unlock iPhone with Broken Screen
- 9. Unlock Disabled iPhone with iTunes
- 10. Unlock iPhone without Face ID
- 11. Unlock iPhone in Lost Mode
- 12. Unlock Disabled iPhone Without iTunes
- 13. Unlock iPhone Without Passcode
- 14. Unlock iFace ID While Wearing Mask
- 15. Lock Apps on iPhone
- 16. Bypass iPhone Passcode
- 17. Unlock Disabled iPhone Without PC
- 18. Unlock iPhone With/Without iTunes
- 19. Unlock iPhone 7/6 without PC
- 20. Unlock iPhone Passcode Screen
- 21. Reset iPhone Password
- 22. Bad ESN/Blacklisted IMEI on iPhone
- 23. Change Lock Screen Timer on iPhone
- 24. Remove Carrier Lock/SIM Restrictions
- 25. Get iMei Number on Locked iPhone
- 26. How to Check If iPhone is Carrier Locked
- 27. Check if an iPhone is Unlocked with iMei
- 28. Bypass iPhone Lock Screen Using Emergency Call
- 29. Change iPhone Screen Lock Time
- 30. Change Clock Font on iPhone To Fit Your Style
- Remove iCloud Lock
- 1. Remove iCloud from iPhone
- 2. Remove Activate Lock without Apple ID
- 3. Remove Activate Lock without Password
- 4. Unlock iCloud Locked iPhone
- 5. Crack iCloud-Locked iPhones to Sell
- 6. Jailbreak iCloud Locked iPhone
- 7. What To Do If You Bought A Locked iPhone?
- Unlock Apple ID
- 1. iPhone Asking for Apple ID Randomly
- 2. Get Apple ID Off without Password
- 3. Remove an Apple ID from iPhone
- 4. Remove Apple ID without Password
- 5. Reset the Security Questions
- 6.Change Credit Card on Apple Pay
- 7.Create an Apple Developer Account
- 8.Apple ID Verification Code
- 9.Change the Apple ID on MacBook
- 10.Remove Two Factor Authentication
- 11.Change Country on App Store
- 12.Change Apple ID Email Address
- 13.Create a New Apple ID Account
- 14.Change Apple ID on iPad
- 15.Change Your Apple ID Password
- 16.Apple ID Not Active
- Remove SIM Lock
- 1. Unlock iPhone Using Unlock Chip
- 2. Unlock iPhone for Free
- 3. Unlock iPhone Online
- 4. Unlock EE iPhone
- 5. Factory Unlock iPhone
- 6. SIM Unlock iPhone
- 7. Unlock AT&T iPhone
- 8. Unlock iPhone with IMEI Code
- 9. Unlock iPhone without SIM Card
- 10. Unlock Cricket iPhone
- 11. Unlock iPhone MetroPCS
- 12. Unlock iPhone with/without SIM Card
- 13. Unlock Telstra iPhone
- 14. Unlock T-Mobile iPhone
- 15. Unlock Verizon iPhone
- 16. iPhone IMEI Checker
- 17. Check If iPhone Is Unlocked
- 18. Verizon's Samsung Phones
- 19.Apple Watch and AT&T Deals
- 20.Add a Line to AT&T Plan
- 21.Unlock Your AT&T Phone
- 22.AT&T's International Plans
- Unlock iPhone MDM
- 1. MDM On iPhone
- 2. Remove MDM from iPhone
- 3. Remote Management on iPhone
- 4. Unlock MDM Softwares
- 5. MDM VS MAM
- 6. Top MDM Bypass Tools
- 7.IoT Device Management
- 8.Unified Endpoint Management
- 9.Remote Monitoring Software
- 10.Enterprise Mobility Management
- 11.MDM Solutions for Device Management
- Unlock Screen Time Passcode
- 1. Reset Screen Time Passcode
- 2. Turn Off Screen Time without Passcode
- 3. Screen Time Passcode Not Working
- 4. Disable Parental Controls
- 5. Bypass Screen Time on iPhone Without Password
- Unlock Apple Watch
- ● Manage/transfer/recover data
- ● Unlock screen/activate/FRP lock
- ● Fix most iOS and Android issues
- Unlock Now Unlock Now Unlock Now
James Davis
staff Editor